The AutoCAD user interface
For many years, AutoCAD has been the industry leading CAD application for companies to create their technical 2D drawings, plans and layout. Here at Armada we’ve been providing Autodesk-accredited AutoCAD training for over 20 years, so we appreciate how overwhelming AutoCAD can be at first glance. Like many other CAD, design and 3D modelling applications, one of the most daunting aspects is the user interface and related terminology. The interface looks complex, and you’re not sure what the purpose of the various toolsets, menus, options, and so on…
In this blog post, Lyndsay Mann introduces AutoCAD’s user interface, the key areas within it, and some of the key features that you’ll use to create your AutoCAD drawings.
When you first launch AutoCAD, the user interface looks like this…
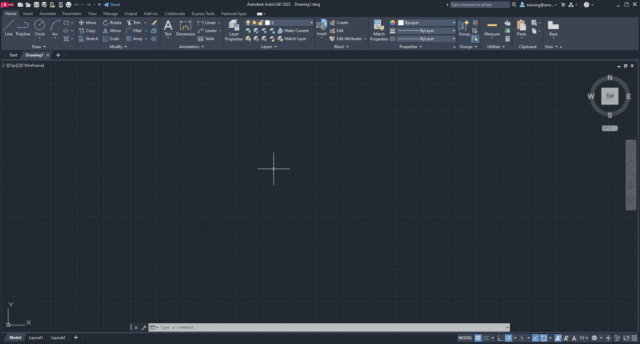
The menu browser
From here you can browse the classic drop-down menus available, and perform a search of the menus, actions, tooltips and command prompt text strings. You can also browse recent drawings, those currently open and commands recently removed from the menu browser.
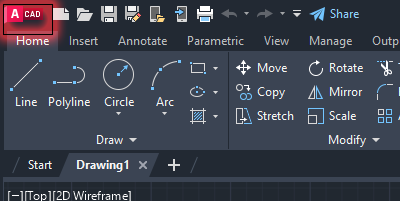
The Ribbon
This is the AutoCAD user interface component you’ll use most often. You use it to access commands, settings and features. It made up of a series of tabs, each of which comprises multiple panels, with each panel providing a range of tools you use to carry out a specific drawing task; for example, the draw panel contains tool to create objects (such as lines, circles and ellipses), whilst the modify panel contains tools to modify objects (such as move, copy and rotate).

As standard, the ribbon is displayed horizontally across the top of the screen. However, it can also be displayed vertically to the left, or vertically to the right of the drawing window. You could also choose to have it ‘un-docked’ as a floating palette within your drawing area, or even on a second monitor!
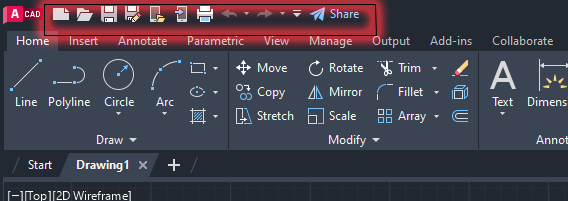
Quick access toolbar
Holds key AutoCAD commands you use frequently. As standard, it offers New, Open, Save, Plot, Save As, Undo and Redo. You can easily add further commands that you use frequently in your work.
The drawing area
As the name suggests, this is your space where you create your AutoCAD drawings. This is essentially a rectangular space, with a grid on.
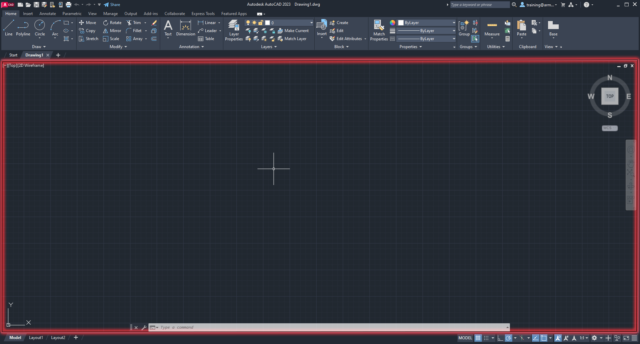
You can adjust the appearance and many settings that determine how your drawing area looks and works, such as the theme, background colour, and location of the command line. Please don’t do this ahead of your training though – our courses are based on AutoCAD in it’s ‘out-of-the-box’ state.
The Command line
At the heart of AutoCAD, and arguably one of its most vital features, is the command line…

Here, you can activate AutoCAD tools by simply typing the command name or alias.
In more recent versions of AutoCAD, when you start typing a command, you’re offered a list of matching commands to choose from…

The command line also provides information on what you should do next to execute any given command. As standard, this information is docked at the bottom of your AutoCAD interface, and displays a fixed number of visible lines. Should you choose to ‘float’ the command line, you can expand it to show more data.
Viewports controls
The viewport control is located in the upper left of the drawing area. From here you can change the visual style of your drawing, and display multiple views of the same drawing.
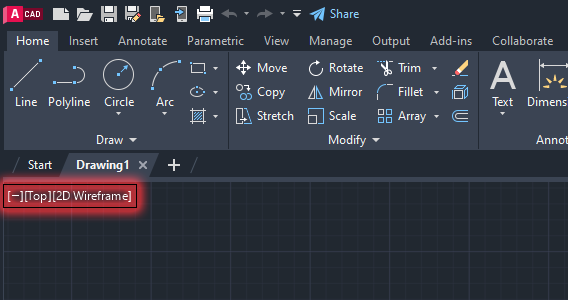
The view cube allows you to rotate the view of your drawing, to see it from a different viewport.
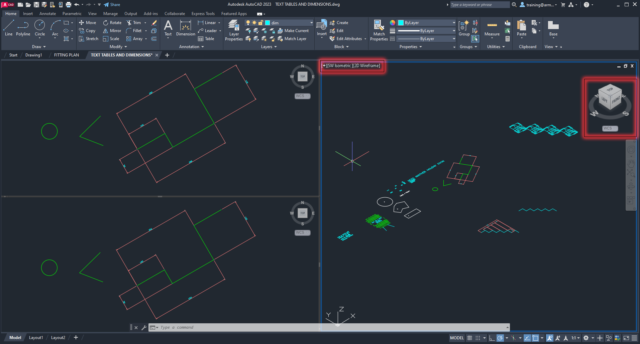
You can easily add or remove viewports using the VPORTS command, or from the View tabs in the ribbon.
Status bar
Provides the coordinate values (location) of your cursor, and quick access to several buttons, from turning drawing tools on and off, to display tools commonly used to scale annotations.

InfoCentre
Provides access to:
- Product-related information, such as the specific version of AutoCAD you’re using and your Autodesk software subscription.
- Information and help that will be useful as you use AutoCAD.

Conclusion
I hope this information is helpful when you start using AutoCAD.
Armada offers AutoCAD training to users at all levels.
For information about our three-day introductory-level course, see AutoCAD Essentials.
For details about the follow-on AutoCAD courses available, and the training we offer in the AutoCAD toolsets, see AutoCAD follow-on courses.

















Leave a comment